Setting up Finance
The first steps before the books can run: chart of accounts, posting periods, G/L account determination, payment method accounts and tax accounts.
For companies without sap.
Everything below is in Settings → Finance, which has the tabs General, Posting periods, G/L account determination and Postings. You need the Finance: settings permission (posting periods need Finance: periods).
1. Load a chart of accounts
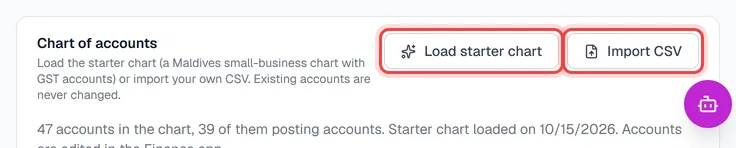
On the General tab, in the Chart of accounts card:
- Load starter chart adds a ready-made chart for a small Maldivian business, with GST accounts.
- Import CSV reads your own chart. The file needs a header row with at least code, name and class (asset, liability, equity, income or expense); parent_code, header and description are optional. You see the rows before anything is imported.
Both only add accounts that are missing. Accounts that already exist are never changed. You then edit the chart in the Finance app; see Chart of accounts.
2. Fiscal year, lock date and numbering
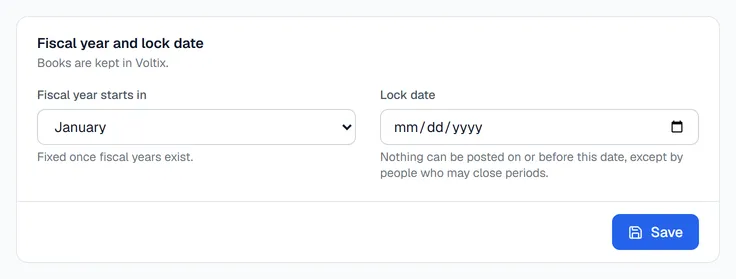
- Fiscal year starts in: the first month of your financial year. It cannot be changed once posting periods exist.
- Lock date: nothing can be posted on or before this date, except by people with Finance: periods. Move it forward once a month has been checked and reported.
- Journal entry numbering: the prefix and the next number. Entries get their number when they are posted. The next number can only be raised.
Click Save in each card.
3. Create the posting period
Entries can only be posted into an open period. Open Posting periods and create the current year; see Posting periods and year-end.
4. Check the G/L account determination
The G/L account determination tab decides which accounts the automatic postings use: receivables, sales revenue, payables and so on. The starter chart comes with a DEFAULT rule that covers everything. If a required account is missing, a yellow warning names it there and on the Finance overview. See Automatic postings.
5. Give each payment method its account
Payments post to the account of the payment method on the terminal that took them. There is no company-wide fallback, so every payment method needs one:
- 1Open Settings → Point of Sale → Terminals and open a terminal's payment methods.
- 2Under Accounts, click Set accounts and enter the account code for each method, for example 1110 for cash and 1130 for bank transfer.
- 3Save, and repeat for every terminal.
For the Sales app, set the accounts in Settings → Sales, under the profile's Payment methods & accounts. Register cash in and cash out use the account of the terminal's cash payment method.
6. Tax accounts
Open Settings → General → Tax groups and edit each tax group. Set its Sales tax account and Purchase tax account. A tax group also keeps a history of rates (Effective from and Rate %), so a GST change is applied to documents from the date it takes effect.
7. Opening balances
Post your opening balances as an ordinary journal entry dated the day before you start, with the balancing difference on an equity account. See Journal entries.