Take payment
Cash with change, card, bank transfer, cheque, on account, or several methods at once, and the receipt that follows.
Show the steps for
Open the payment screen
With the customer chosen, click Payment under the cart (or press Ctrl+Space). The Payment Terminal shows the Amount Due and a tile for every payment method your terminal accepts.
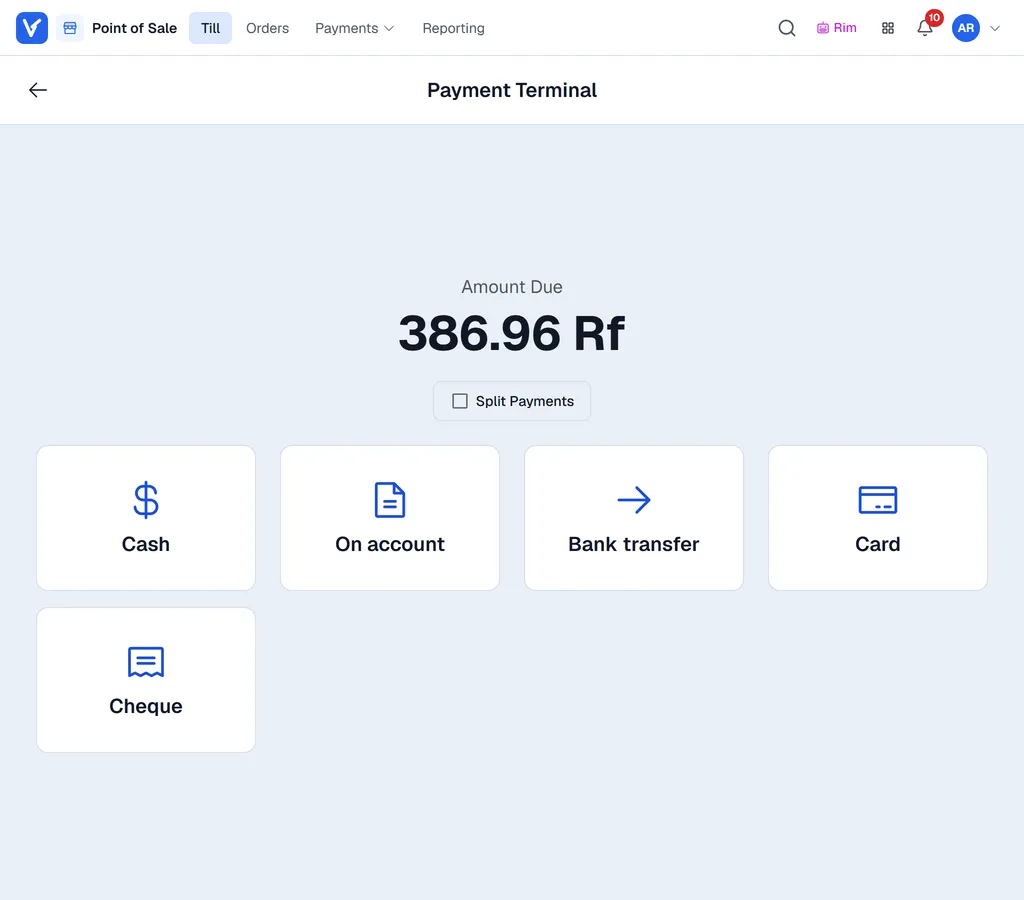
A tile with a lock and Restricted is a method you are not allowed to use. Click the arrow at the top left to go back to the cart.
Cash
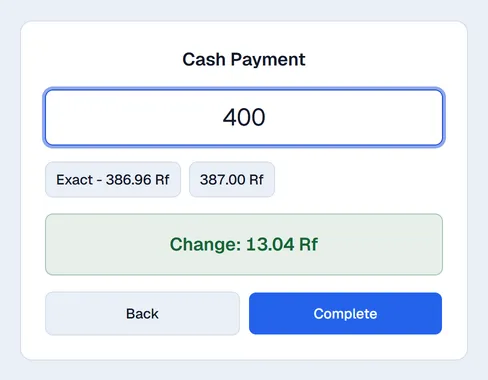
- 1Click Cash.
- 2Enter the Amount received, or click one of the quick amounts: Exact or the next round amounts.
- 3Voltix shows the Change to give back.
- 4Click Complete.
Card and on account
Click the Card tile (or the debit or contactless tile your company uses). The payment is recorded straight away; there is nothing else to fill in.
Click On account to put the whole amount on the customer's account. It is collected later in Receive Payments.
Bank transfer
- 1Click Bank transfer.
- 2Enter the Transfer Reference if you have one. It can be at most 27 characters; put anything longer in the sale's note.
- 3Check the Amount.
- 4If your company stores payment slips, drag the slip onto Attach payment slips or click it to choose a file.
- 5Click Complete.
Paid with two transfers? Click + Add another payment. Each transfer gets its own reference, amount and slips, and is recorded as a separate payment.
Cheque
- 1Click Cheque.
- 2Enter the Check Number, Check Due Date, Bank and Amount.
- 3For more than one cheque, click + Add another payment. The amounts must then add up to the amount due exactly.
- 4Click Complete.
Several methods at once
- 1Tick Split Payments.
- 2Click each method the customer is paying with, then Proceed to Payment.
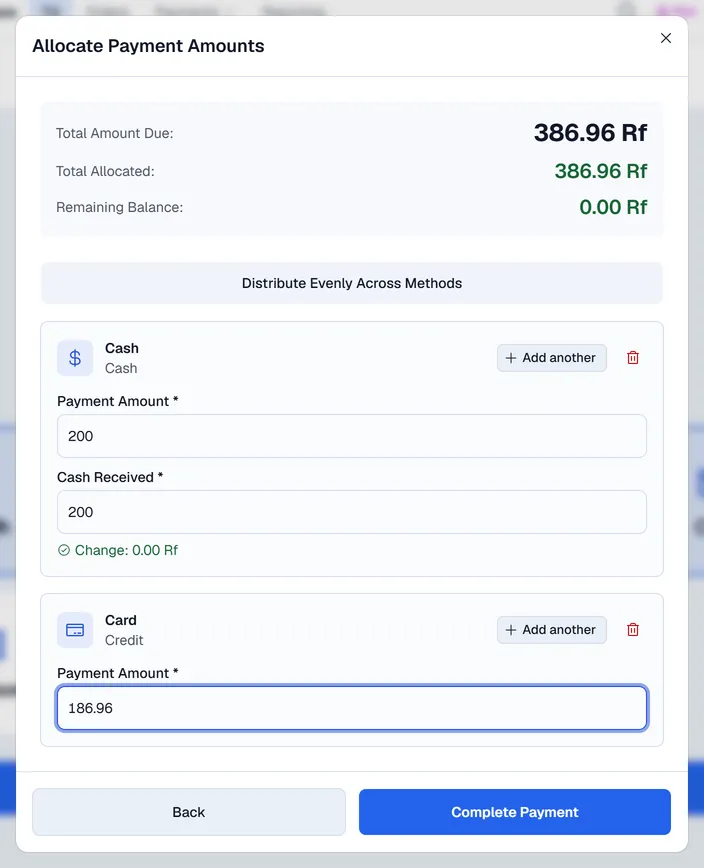
- 3In Allocate Payment Amounts, enter the Payment Amount for each method. For cash, also enter the Cash Received. Click Distribute Evenly Across Methods to share the total equally.
- 4Need the same method twice, for example two cards? Click Add another on that method.
- 5Click Complete Payment.
Foreign currency
When the cart is in another currency, amounts are shown and entered in that currency. Voltix also keeps them in your base currency at the cart's exchange rate.
After payment
Voltix shows Payment Approved, then opens the document your terminal is set up for:
- A receipt, ready to print on the receipt printer, download as PDF or share.
- An invoice on A4 or A5 paper: choose the size and the invoice opens to print, download or share.
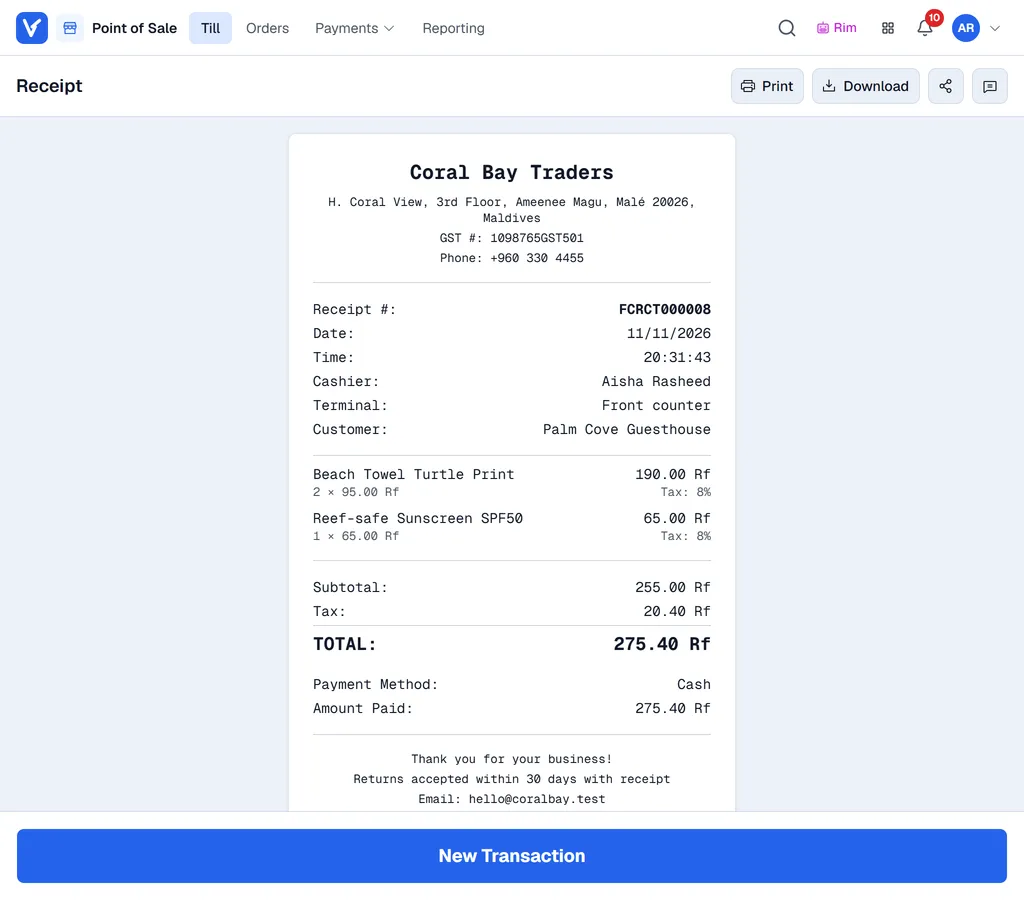
Click New Transaction to start the next sale.
What happens in SAP
The invoice and its payments are posted to SAP Business One as you click Complete, and the SAP document number is shown.
- SAP Posting Failed: SAP refused the sale. Nothing was saved, and the cart is still there. The line SAP complained about is marked red. Fix it and take payment again.
- Payment Not Posted to SAP: the invoice reached SAP but the payment did not. Do not take the money again. Tell your accounts team, who record the payment in SAP.
What happens in the books
The sale is saved with your terminal's next invoice and receipt number, and the stock of each item goes down. With the Finance app, the invoice and each payment are posted to your accounts automatically.
What happens in QuickBooks
The sale is saved with your terminal's next invoice and receipt number and sent to QuickBooks Desktop automatically shortly afterwards. You do not need to wait for it.
Reprint later
Open Orders, click the sale, and use Print or Download in its panel (the arrow next to each picks A4 or A5). See The Orders screen.