Set up the Helpdesk
Create your teams, adjust their stages, add tags and canned responses, and choose the company-wide Helpdesk switches and ticket numbering.
1. Create a team
Every ticket belongs to one team, for example "Shop support" or "Repairs". Team members come from the Employees app, so add your staff there first.
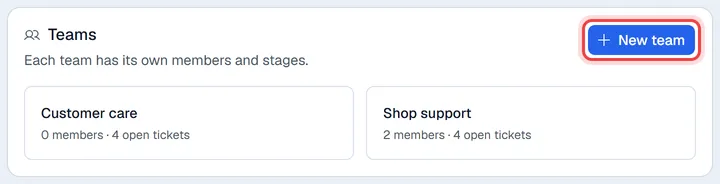
- 1Open Settings → Helpdesk, tab Teams and SLAs.
- 2Click New team.
- 3Type the Name and, if you like, a Description.
- 4Click the employees who should be Members. Selected names are highlighted.
- 5Choose the options below and click Save team.
| Option | What it does |
|---|---|
| Close quiet tickets after (days) | An open ticket with no activity for this many days is moved to the team's cancelled stage automatically, with the note "Automatically closed after inactivity". Leave it empty to never close tickets this way. |
| SLA policies apply | Tickets of this team get an SLA deadline. See SLA policies. |
| Timesheets on tickets | Lets members log hours on this team's tickets, when timesheets on tickets is also switched on for the company. |
| Active | Switch off to stop new tickets for the team without deleting it. |
A team that still has tickets cannot be deleted: make it inactive instead.
2. Adjust the stages
A new team starts with five stages: New, In Progress, On Hold, Solved and Cancelled. Click the team again to change them.
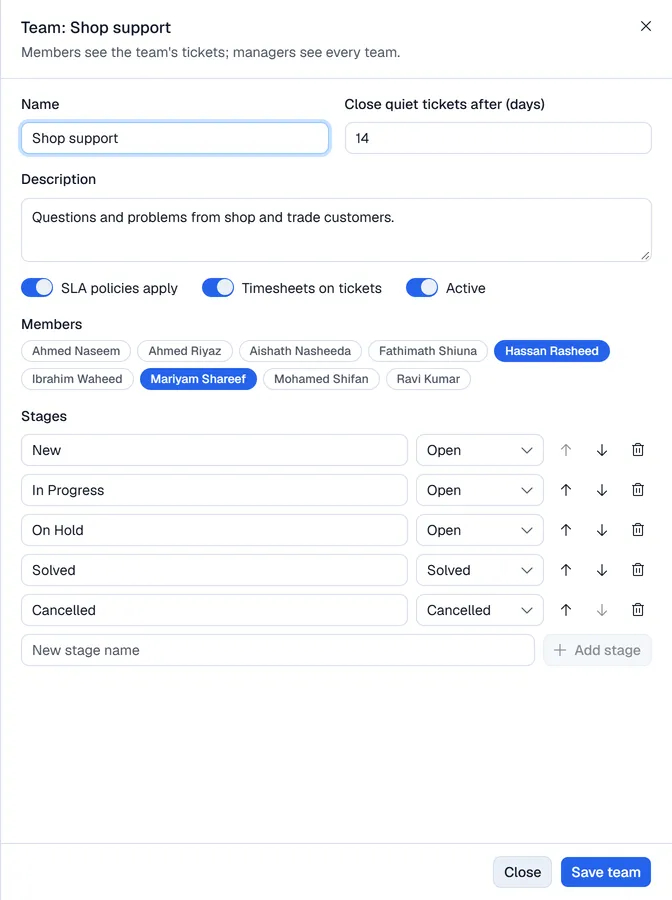
- Rename a stage by typing over its name.
- Each stage has a type: Open, Solved or Cancelled. New tickets start in the first open stage. Moving a ticket to a solved stage records when it was solved.
- Use the arrows to change the order and the bin to delete a stage. A stage that still holds tickets cannot be deleted: move the tickets first.
- Type a New stage name and click Add stage.
3. Tags and canned responses
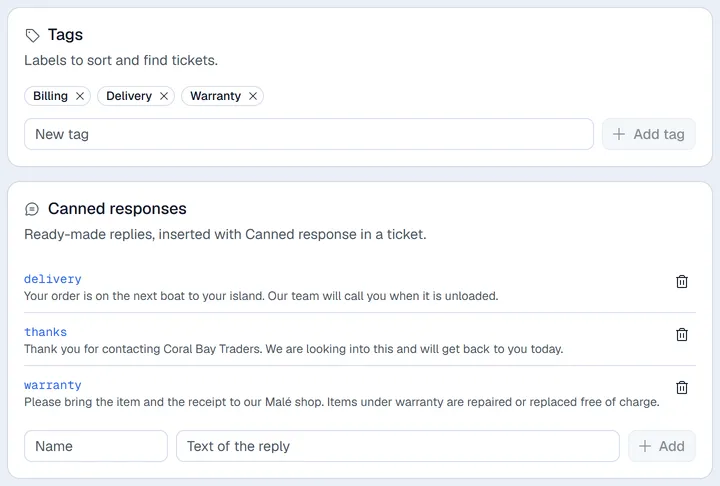
On the Tags and replies tab:
- Tags group tickets, for example Delivery, Warranty or Billing. Type a New tag and click Add tag. Click the small cross on a tag to remove it.
- Canned responses are ready-made replies. Type a short Name (no spaces) and the Text of the reply, then click Add. In a ticket, the Canned response button above the reply box puts the text in the reply (see Work on a ticket).
4. Company-wide switches
Stay in Settings → Helpdesk.
On the Features tab, each switch takes effect as soon as you click it:
| Switch | What it does |
|---|---|
| Create tickets from documents | Adds Create Support Ticket to the order details of a receipt. |
| Link service orders | Lets agents link a service order to a ticket. |
| Solve when the linked service order completes | When the linked service order is closed, the ticket moves to its Solved stage. Checked every 5 minutes. |
| Timesheets on tickets | Lets agents log hours on tickets. Needs the Timesheets app. |
| E-mail the customer | Sends the ticket contact an acknowledgement when a ticket is created, each reply you send, and a message when the ticket is solved. Needs outgoing e-mail set up for your company. |
On the Numbering tab, set the ticket Prefix (default TKT-) and the Next number. Tickets are numbered with five digits, for example TKT-00001. The next number can only be raised, never lowered, so a number is never handed out twice. Click Save.