Setting up Timesheets
Give people access, link their logins to employee records, and decide what time can be logged against and whether weeks need approval.
Note. If you do not see the Timesheets app at all, ask your Voltix contact to switch it on for your company. Timesheets works together with the Employees and Projects apps.
1. Give people access
Open Settings → Users, edit the user and switch on Timesheets under App access (this company). The Timesheets tile appears on their apps screen.
2. Link each login to an employee
Hours belong to employees, so every person who logs time needs their login linked to their employee record:
- 1Open Employees and click the person.
- 2Click Edit.
- 3Under Login and HR, pick their user in Login account and click Save changes.
A person whose login is not linked sees a message instead of the grid.
3. Choose the company rules
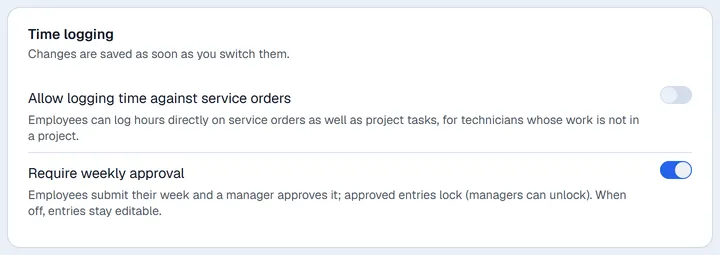
Open Settings → Timesheets. Managers and administrators can change these switches; each change is saved as soon as you switch it.
| Switch | When on |
|---|---|
| Allow logging time against service orders | Service orders can be picked in the grid as well as project tasks. Useful for technicians whose work is not in a project. |
| Require weekly approval | People submit their week and a manager approves it; approved hours lock until a manager unlocks them. When off, there is no submitting or approving and entries stay editable. |
Weekly approval is on until you switch it off.
4. Time on Helpdesk tickets (optional)
To let agents log time on tickets:
- 1In Settings → Helpdesk, switch on Timesheets on tickets.
- 2On each Helpdesk team, keep Timesheets on tickets ticked. Untick it for a team that should not log time.
Tickets then have a Time tab where agents log hours.
Who can do what
| Role | Can |
|---|---|
| Any user with Timesheets access and a linked employee | Log, change and submit their own hours. |
| Manager, administrator | All of the above, plus Approvals and Settings → Timesheets. |