Create a ticket
Record a customer's request as a ticket, by hand in the Helpdesk or straight from a sale.
Show the steps for
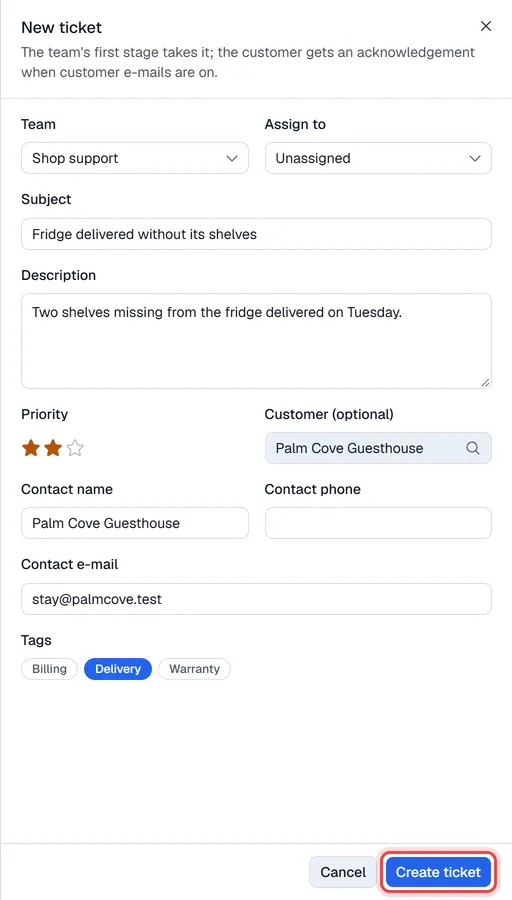
New ticket in the Helpdesk
- 1Open Helpdesk → Tickets and click New ticket. The form opens at the side of the screen.
- 2Choose the Team. You can only use teams you are a member of (admins and managers can use any team).
- 3Set the Priority with the stars and, if you know who will handle it, Assign to a team member.
- 4Type the Subject (required) and a Description.
- 5Under Customer (optional), click Pick a business partner, type a name, code or phone and click the customer. Their name, phone and e-mail fill the contact fields; you can change them. For a walk-in customer, leave the customer empty and type the Contact name, Contact phone and Contact e-mail.
- 6Click any Tags that apply.
- 7Click Create ticket.
The ticket gets the next number, starts in the team's first open stage and opens straight away. If an SLA policy matches, its deadline starts counting now.
If E-mail the customer is on in Settings → Helpdesk and the ticket has a contact e-mail, the customer receives an acknowledgement with the ticket number.
Tickets are kept in Voltix only; nothing is sent to SAP Business One.
Tickets are kept in Voltix only; nothing is sent to QuickBooks.
Ticket from a sale
When a customer comes back about something they bought, start the ticket from the receipt so the two stay linked.
- 1Open the order details of the receipt (for example from the orders list).
- 2Click Create Support Ticket.
- 3Choose the Team, check the Subject (it starts as "Issue with receipt" and the receipt number), set the Priority and describe the issue.
- 4Create the ticket. The window shows the new ticket number; click Done.
The ticket carries the customer of the sale and shows the receipt under Related document.
Tip. The button only appears when Create tickets from documents is switched on in Settings → Helpdesk.