Users and access
Add the people who sign in, decide which apps they see and which locations they work in, and give them permissions through permission groups.
Access in Voltix has three layers:
- 1The role of the user (manager, cashier or viewer) sets the broad level.
- 2App access decides which app tiles the user sees.
- 3Permission groups (Settings → Authorization) switch on specific actions, such as giving discounts or approving documents.
Users
Open Settings → Users. The list shows each user's role, location, apps, status and last sign-in. Search by name, e-mail, phone or location; click a column header to sort, and a row to edit the user. On a phone each user is a card.
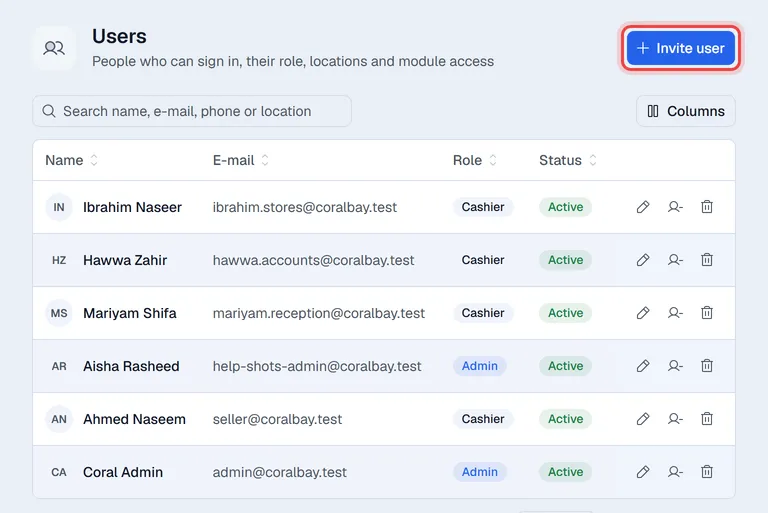
Add a user
- 1Click Invite user. The form opens at the side of the screen.
- 2Enter First name, Last name, E-mail and Phone.
- 3Pick a Role: Manager, Cashier or Viewer, and a Status.
- 4Tick one or more Locations (see below).
- 5Under App access (this company), switch on each app the user should see.
- 6Under How they sign in the first time, choose: - E-mail invitation: the user gets an e-mail to set their own password. - Password I give them: Voltix makes a password for you to copy and hand over. Use the copy button; the arrows make a new one.
- 7Click Invite user.
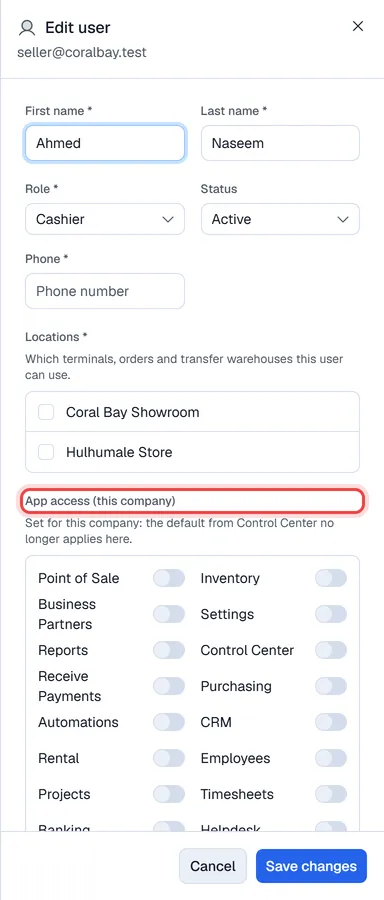
Change, deactivate or delete
The buttons at the end of each row:
| Button | Does |
|---|---|
| Pencil (Edit user), or click the row | Change name, role, status, phone, locations and app access. |
| Envelope (Resend invitation) | Only for users still Pending: sends the invitation again. |
| Deactivate user / Activate user | Stops or allows signing in, keeping the user and their history. |
| Bin (Delete user) | Removes the user. Prefer deactivating someone who has made documents. |
Locations
Locations decide which terminals, orders and transfer warehouses a user can work with. Users who are not managers or administrators only see the documents of their own locations in lists such as sales and quotations. Locations themselves are set up in General.
Permission groups
Open Settings → Authorization. A user gets the permissions of every group they belong to. Without a group, a user who is not an administrator has no extra permissions. Administrators always have every permission.
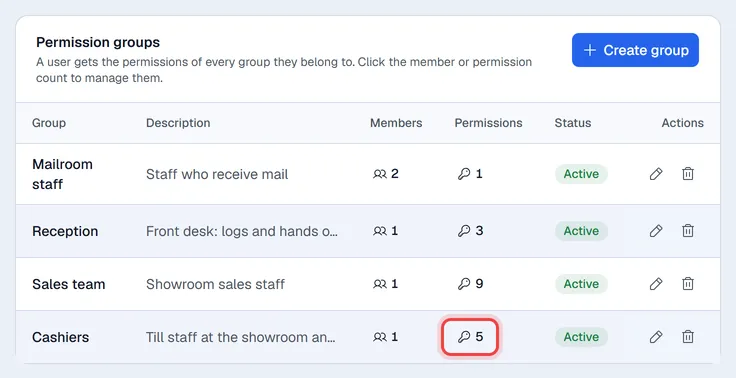
Create a group
- 1Click Create group.
- 2Enter a Group name and a Description.
- 3Keep Active switched on (an inactive group gives its members nothing).
- 4Switch on Default group if new users should join it automatically.
- 5Click Create group.
Add members
Click the member count on the group's row (Manage members): the members open at the side of the screen. Click Add member, pick a user under Add a user to this group and click Add. The bin on a member removes them from the group.
Choose the permissions
Click the permission count (Manage permissions): the permissions open at the side of the screen. Tick what the group may do, then click Save permissions. Changes apply at once to every member. Among them:
| Setting | Effect |
|---|---|
| Payment methods | Which payment methods members may take at the till. |
| Discount limit | Tick Enable discount restrictions and set the Maximum discount. Members can give percentage discounts up to that limit, on lines and on the whole order. Fixed-amount discounts are not limited. |
| Allow price rate override | Members may change an item's price on a sale. |
| Allow cancel invoice | Members may cancel posted invoices. |
| Allow cash in / out | Members may add or take cash from the register. |
| Allow returns and exchanges | Members may do returns without a manager. |
| Allow goods issue, transfer request and transfer permissions | Stock documents members may create or handle. |
| App permissions | For example Sales: use, Sales: approve, Finance: post entries. Each app's setup page lists its own. |
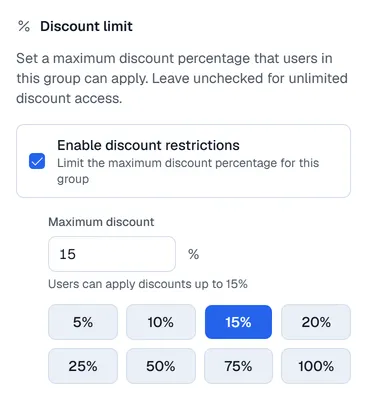
The maximum discount and the price override apply to the Point of Sale and the Sales app alike.