Make a sale
Add products, choose the customer, change quantities and units, and work with several carts at once.
Show the steps for
Add products
There are three ways to put a product in the cart:
- Tap its tile. Use the category buttons above the tiles to narrow the list, or switch to the list view with the icons on the right.
- Search. Type a name, item code or barcode in Search products… (or press Ctrl+S to jump there).
- Scan. Scan a barcode with your scanner, or click Scan to use the device's camera. A product that is not found shows Product not found with the barcode you scanned.
Tapping a product that is already in the cart adds one more to its line. If your terminal allows the same product on several lines, it adds a new line instead.
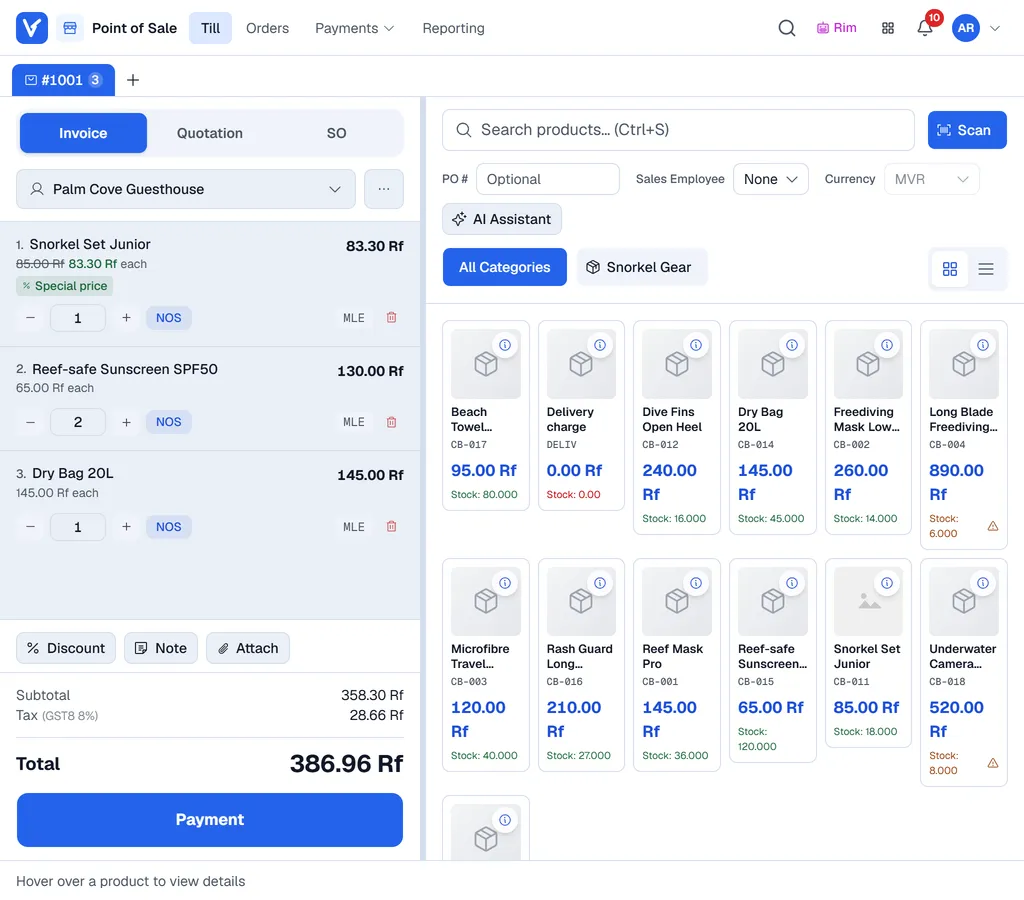
Each tile shows the price and the Stock in your terminal's warehouse. A warning sign means stock is low; red means none is left. Click the (i) on a tile to see the stock in every warehouse.
Choose the customer
- 1Click Select Customer at the top of the cart.
- 2Type part of the name, code, phone number, e-mail or tax number.
- 3Click the customer.
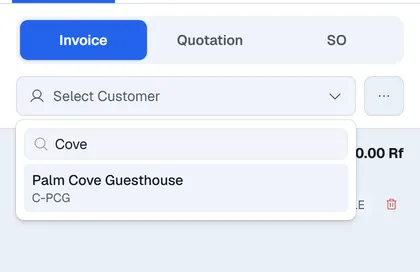
New carts start with your terminal's default customer, marked Default. Pick the real customer whenever you know them, so the sale appears on their account and their currency applies.
The badge next to the customer tells you more:
| Badge | Meaning |
|---|---|
| Default | The terminal's default customer. |
| A currency, or (Multi) | The customer pays in that currency, or may pay in any currency. See Discounts, prices and notes. |
Change a line
Every line shows the quantity, the unit and the warehouse.
- Quantity: use − and +, or type the number.
- Unit: click the unit (for example NOS) and choose another unit of the product, such as a box. The price changes to that unit's price. The terminal remembers the unit you used last for each product.
- Remove: click the bin icon.
- Select: click a line to select it, for example to discount only that line. Clear removes the selection. A discount above your limit needs a manager: see More than your limit.
Batches and serial numbers
If your company tracks batches or serial numbers, lines for those products show Batch? or Serials? until they are allocated.
- Batches are allocated automatically, earliest expiry first. Click the chip to change them.
- Serial numbers are always picked by hand: click Serials?, tick the numbers and click Confirm.
You cannot take payment until every line is fully allocated.
Work with several carts
The tabs above the cart (#1001, #1002…) are separate carts. Click + to start another one while the first customer looks for their wallet, then switch back by clicking its tab. The x on a tab throws that cart away without asking.
Carts are kept on this device for this terminal. If you leave the POS or the browser closes, they are back when you return.
On a phone
On a phone the POS switches to a phone layout by itself (the terminal stays retail or wholesale; a PC or tablet opening the same terminal sees its usual screen):
- The product search, Scan and the products fill the screen, two tiles across. Tap a tile to add it.
- The bar at the bottom shows the cart's total and the number of lines. Tap it to pull up the cart: the lines with - and +, the unit, Discount, Note, the customer, and the PO number and currency at the top. Close it with the x.
- Pay in the bar opens the payment straight away (Save for a quotation or sales order). After a sale, New sale starts the next one.
Start again
To throw away the current cart, open the … menu next to the customer and choose Cancel Order, then Yes, Cancel.
When you are ready
Click Payment (or press Ctrl+Space). See Take payment.