Discounts, prices and notes
Discount a line or the whole order, change a price, switch price list or currency, and add notes and references.
Give a discount
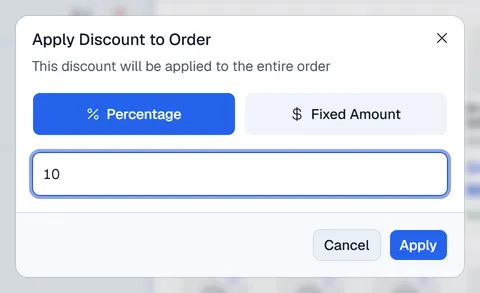
- 1To discount some lines only, click those lines first so they are selected. To discount the whole order, select nothing.
- 2Click Discount (or press Ctrl+D).
- 3Choose Percentage or Fixed Amount and enter the value.
- 4Click Apply.
A discounted line shows a badge such as 10% off. Click the × on the badge to remove it. An order discount shows in the totals as Discount (10%), with its own ×.
A line can have its own discount AND the order discount: both apply. The line's own discount comes off first, then the order discount comes off what is left. The invoice, quotation or sales order is saved with exactly the total the till shows.
More than your limit: Manager override
When you enter more than your limit, the dialog says, for example, Your limit is 10 %. A manager can approve more.
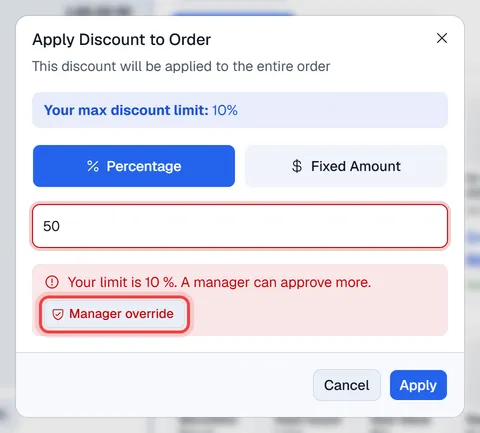
- 1Click Manager override.
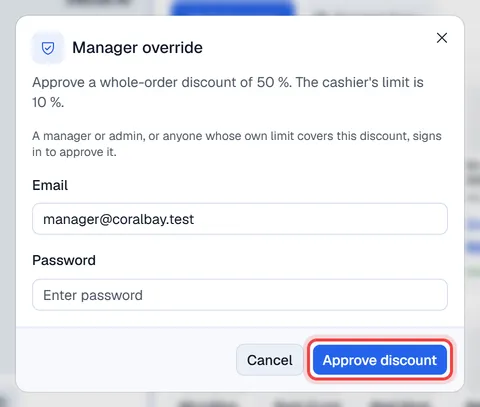
- 2A manager or admin (or anyone whose own limit covers the discount) enters their e-mail and password.
- 3Click Approve discount. The discount is applied.
A line discount approved this way shows Approved by and the manager's name under the line (in the wholesale table, a small shield next to the discount; point at it to see the name). An approved order discount shows the shield next to Discount in the totals. The approval is not printed on the document, but it is in Settings → Audit log: who approved it, their limit, the percentage and the document. So the cashier is never blamed for a discount a manager approved.
The same works for quotations and sales orders made in the POS.
Some products get a lower price automatically when the customer buys enough of them. Those lines show a badge such as Qty 10+.
Change a price
- 1Click the price under the line (for example 85.00 Rf each).
- 2Enter the New Price and click Apply Price.
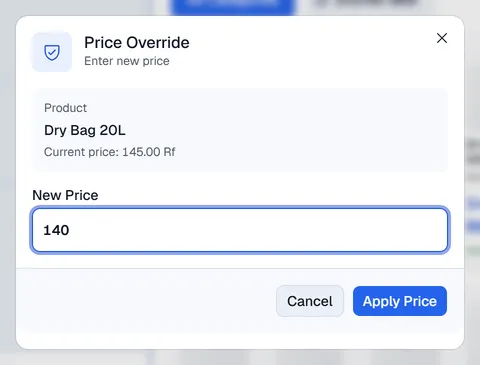
The line shows Rate edited. Click its × to go back to the normal price.
If you are not allowed to change prices, the dialog asks for Authorization required: a manager enters their e-mail and password and clicks Authorize & Apply.
Use another price list
The cart uses your terminal's default price list. To use a different one for this sale:
- 1Open the … menu next to the customer and choose Pricelist.
- 2Click the price list and Apply.
If the cart already has items, Voltix warns that changing the price list will clear the cart. Click Yes, Clear Cart to continue.
Sell in another currency
With multi-currency sales switched on for your company, a Currency picker appears above the products.
- A customer who always pays in one currency gets that currency automatically, and the picker is locked.
- A customer marked for any currency starts in your base currency and can be switched.
The cart then shows Prices in that currency and the exchange Rate used. If no exchange rate is set up for that currency, Voltix tells you so; ask your administrator to add it.
Add notes and references
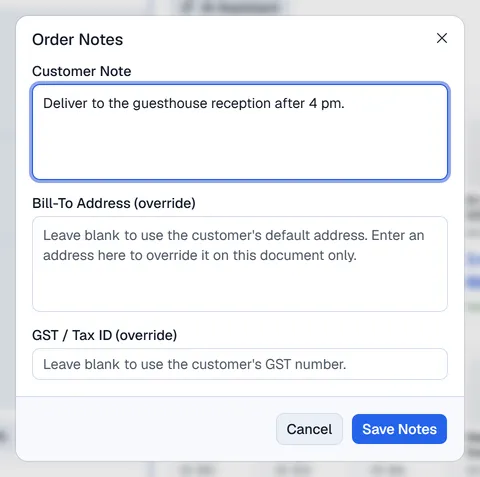
Click Note (or press Ctrl+N) to open Order Notes:
- Customer Note: printed on the receipt or invoice.
- Bill-To Address (override): a different billing address for this document only.
- GST / Tax ID (override): a different tax number for this document only.
Click Save Notes.
Above the products you can also fill in:
- PO #: the customer's purchase order number.
- Sales Employee: who made the sale, when your company tracks it.